If you’re a resident of Silver Spring, MD and you’ve recently had concrete floors installed, an epoxy coating is an excellent way to extend their lifespan while giving them an appealing aesthetic. In this comprehensive guide, we’ll dive into the world of epoxy coatings, exploring their benefits, types, application process, potential drawbacks, and the number of layers needed for a solid epoxy floor.
Understanding Epoxy and Its Role in Floor Coating
Epoxy, also known as epoxy resin, is a type of polyepoxide made from polymers and reactive prepolymers containing epoxides. This thermosetting polymer, resistant to high heat and chemicals, is created by mixing polyepoxides with polyfunctional hardeners. This makes epoxy versatile for various applications, including electronics, paint brushes, adhesives, and contractor work.
When used in floor coating, epoxy serves as a protective layer that not only enhances the appearance of your concrete floors but also extends their lifespan. An epoxy floor coating is a blend of polyepoxide resin and a polyfunctional hardener applied using a rolling brush. Once the epoxy is cured, it forms a durable layer that can last up to 20 years, making it an ideal choice for areas like garages and basements.
Types of Epoxy Floor Paints
There are three common forms of epoxy used for coating floors:
- Water-based epoxy: This epoxy variant contains 40-60% solids within a water base. It’s a favorite among DIY enthusiasts and professionals due to its low fume emission, making it suitable for enclosed spaces.
- Solvent-based epoxy: While this type also contains 40-60% solids, it uses a solvent base. It is known for producing potent fumes, hence the need for a respirator during application. However, it offers a wide color range and bonds well to the concrete surface.
- Solid epoxy: This is the purest form of epoxy but also the most challenging to use due to its quick hardening nature. Therefore, it is recommended for professional use.
 The Epoxy Coating Process
 The Epoxy Coating Process
Before you begin the process of epoxy coating, it is essential to wait at least 30 days after pouring your concrete to allow it to cure fully. If you are dealing with existing concrete floors, you’ll need to patch any cracks or holes with additional concrete, allowing it to cure for at least 48 hours.
Once your floor is ready, you need to apply 2-3 coats of epoxy. Each coat should cure for at least 12 hours before applying the next. If you’re concerned about slips and falls, you might want to add a non-skid floor coating to the final layer of epoxy.
However, before painting your floors with epoxy, you need to patch any damaged areas of the floor, clean the entire surface thoroughly, and apply a diluted acid mixture to the floor. This process can be time-consuming, possibly taking two or three days. Additionally, epoxy floors can become slippery when wet. To counter this, add anti-skid ingredients to your top layer of epoxy.
Professional Epoxy Coating in Silver Spring, MD
While epoxy is a popular choice for its durability and aesthetic appeal, its application process can be quite involved, particularly for those who are not experienced DIYers. That’s where professional epoxy coating services come in handy.
If you’re looking for experienced epoxy coating professionals in Silver Spring, MD, look no further than The Concrete, Etc. We’ll help you add an epoxy coating to your concrete floors, extending their lifespan by up to 20 years while enhancing their look. Contact us today for a consultation or browse our previous work on our website.
Steps for Professional Epoxy Coating
Below is a simplified breakdown of the steps involved in applying an epoxy coating to your concrete floors:
- Floor Cleaning: The first step involves thoroughly cleaning the floors to remove any dirt, dust or grease. A power scrubber with a stiff-bristle brush is typically used for this purpose. The cleaning process should also extend up to six inches up the wall.
- Repair Work: If there are any cracks, holes, or chips in the floor, they are smoothed over with a small amount of freshly mixed concrete. These repairs are allowed to dry for at least 48 hours.
- Acid-Etching: A solution of 1 part muriatic acid and 10 parts water is spread over the floor’s surface. A long-handled acid brush or power scrubber is then used to scrub the entire floor with the acid solution. After scrubbing, the floor is rinsed three times and allowed to dry completely.
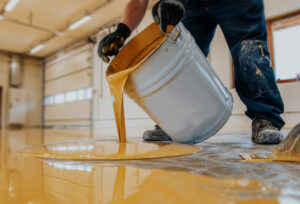
- Epoxy Mixing and Application: With the use of a ventilator, the epoxy is mixed and applied to the floor. A paintbrush is used to paint the floor’s perimeter, while a rolling brush is used for the interior. Each coat is left to dry for at least 12 hours, and the process is repeated for two or three coats. To increase traction when the floor is wet, anti-skid components can be added to the final coat of epoxy.
- Baseboard Application (Optional): If there’s leftover epoxy, a border about six inches from the floor’s bottom can be taped off and painted with epoxy, creating the appearance of baseboards.
By following these steps, we ensure a high-quality and durable epoxy floor coating that not only enhances the aesthetic of your concrete floors but also extends their longevity.
Remember, the epoxy coating has been a popular choice for over a century, making waves in recent years with stunning countertop designs and “exotic pours.” It’s a reliable way to add life and beauty to your garage floors or any concrete surface.
Whether you’re an experienced DIYer or prefer professional assistance, epoxy coating is a worthy consideration for your concrete floors in Silver Spring, MD. Don’t hesitate to contact The Concrete, etc. for expert consultation and service. Together, let’s add a touch of strength and beauty to your concrete floors.